A television-quality broadcast doesn’t require renting an expensive studio. With the right professional livestream setup, even a 3×3 meter bedroom can look polished by controlling camera perspective, light direction, background depth, and equipment placement. The trick isn’t filling the room with gear. It’s making a small space look bigger than it really is.
The biggest mistake is treating every part of the room equally. A cramped background, wide-angle distortion, overhead light, and camera placed too close to the face can instantly make an otherwise expensive setup look amateur. A better approach is spatial architecture: control what the camera sees, then build the technical system around that frame.
You also don’t need a complicated broadcast chain to start. YouTube supports webcam, mobile, and encoder-based workflows, while advanced productions can add external cameras, microphones, mixers, and other hardware.
1. Professional Livestream Setup Starts With Space Optimization and Camera Framing
In a small room, the camera becomes your architect. What matters isn’t the actual size of the bedroom but the portion of it visible inside the frame.
Choose the Camera Position Before Buying More Gear
Start by deciding where the presenter will sit or stand. Don’t automatically push the desk against the wall.
If possible, create 60–100 cm of distance between the presenter and the background. That small gap helps separate the subject from the wall and creates more visual depth.
For a 3×3 meter room, position the camera on the opposite side of the longest usable axis. Remove unnecessary furniture from the camera’s field of view rather than trying to decorate everything.
This is the first rule of good home studio design: design the room for the camera, not for walking around it.
Use Focal Length to Fake a Larger Room
Ultra-wide lenses seem tempting because they capture more of a tiny room. Unfortunately, they can exaggerate faces, stretch furniture, and make the image feel like a phone camera pointed at a bedroom.
For talking-head livestreams, a moderate focal length is generally easier to control. On a full-frame camera, roughly 35–50mm can create a more natural perspective; crop-sensor cameras require corresponding adjustments.
The exact choice depends on sensor size and available distance. The goal isn’t a magic number. It’s avoiding the distorted look created when a camera sits extremely close to the subject.
Frame for the Platform, Not the Room
For conventional landscape livestreaming, keep the eyes around the upper third of the frame and leave enough headroom without creating a huge empty ceiling area.
For vertical content, reframe deliberately rather than simply cropping a landscape composition.
A clean camera framing setup should answer three questions immediately:
- Who is speaking?
- What should viewers look at?
- What information is important around the presenter?
If viewers need to search the frame for the subject, the composition is already working against you.
Create Depth With Three Visual Layers
A premium-looking frame often has three layers:
- Foreground: presenter and desk.
- Middle ground: practical objects such as a plant, shelf, lamp, or monitor.
- Background: wall, curtain, or architectural element.
Don’t overcrowd those layers. One interesting object usually works better than ten decorative items fighting for attention.
This is where space optimization becomes more than simply saving floor area. You’re optimizing visual space.
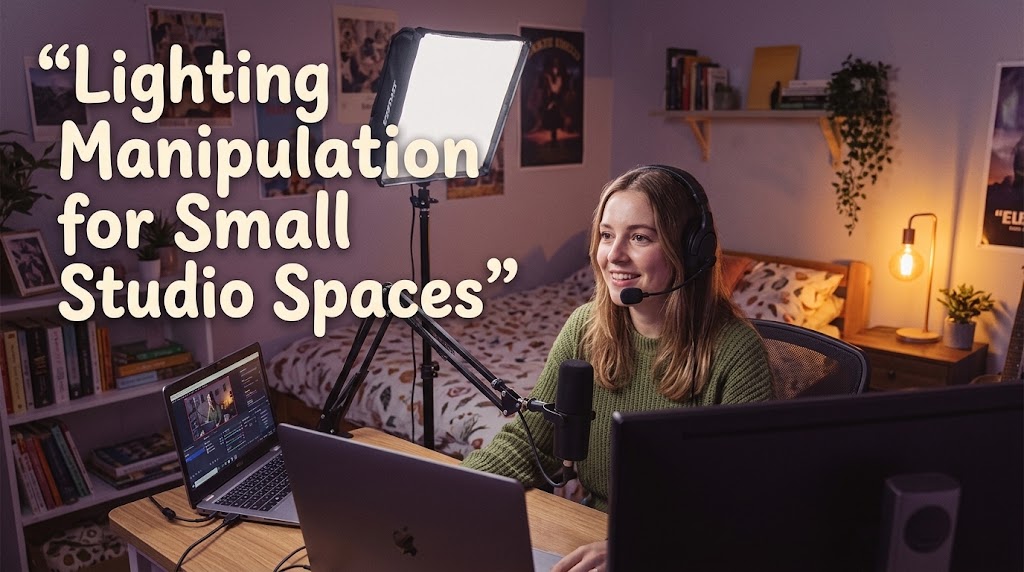
2. Lighting Manipulation Makes a Small Bedroom Look Like a Corporate Studio

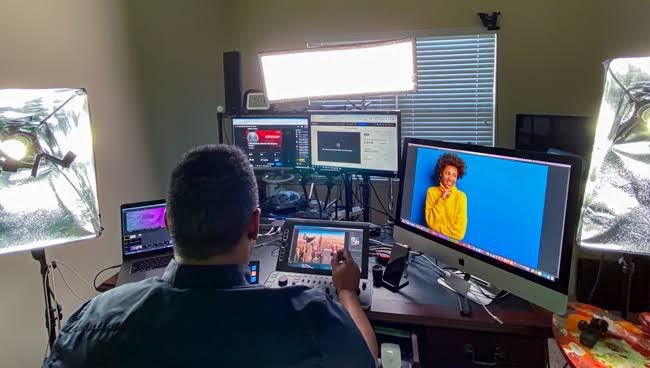
Lighting is usually a better investment than buying another camera.
A good camera with poor lighting can look flat and noisy. A modest camera with controlled light can look surprisingly polished.
Build a Soft Key Light First
Place the main light slightly to one side of the camera and above eye level.
Avoid pointing a harsh LED directly at the face. Instead, use diffusion or a softbox to create smoother shadows.
Modern LED panels are increasingly designed for compact home studios, with slim options available when desk and floor space are limited.
Add a Practical Light for Background Depth
A practical light is simply a visible light source inside the scene, such as a table lamp.
It serves two jobs. First, it provides visual interest. Second, it creates separation between the presenter and the background.
You don’t need RGB everywhere. A warm lamp behind the presenter can often do more for the frame than several cheap colored lights.
Keep the Ceiling Light Under Control
The overhead room light is often the enemy.
It can create dark eye sockets, uneven skin tones, and unflattering shadows under the nose and chin. If possible, turn it off during the broadcast and build your lighting intentionally.
This is the core of lighting manipulation: you aren’t simply adding brightness. You’re deciding where brightness and shadow should exist.
Match Color Temperature
Don’t combine a very cool key light with a strongly orange room lamp unless the contrast is intentional.
A practical starting point is to keep the key light and other major sources relatively consistent, then introduce warmer background light as an accent.
The result should look designed rather than accidental.
3. Audio, Camera and Background Choices That Complete the Professional Look
Once the frame works, finish the system with the components viewers actually experience.
Prioritize the Microphone Over the Second Camera
A viewer can tolerate slightly imperfect video.
Bad audio is different.
For a single-person livestream, a quality USB microphone, wireless lavalier, or properly positioned dynamic microphone can be more valuable than immediately adding another camera.
YouTube itself lists external microphones and cameras among common hardware choices for livestreaming, with more advanced productions using multiple cameras, microphones, mixers, and encoders.
Use the Background as Part of Your Brand
A professional background doesn’t have to resemble a newsroom.
Try:
- One clean wall
- A narrow shelf
- One practical lamp
- A subtle brand element
- A small plant or relevant prop
Keep logos and text readable but secondary to the presenter.
Hide Technical Clutter
Cable management matters more in a small room because everything is visible.
Run cables along desk edges, use short cables where practical, and keep power strips away from the camera’s field of view.
If you’re building the setup for the first time, follow a simple setup workflow before adding advanced equipment. A beginner-focused guide on simple steps to go live for the first time can help establish the basic workflow first.
Use an Encoder Only When You Actually Need One
An encoder becomes useful when your production requires external video sources, screen sharing, multiple cameras, or more advanced production control. YouTube supports both software and hardware encoder workflows.
For a one-person talking-head stream, don’t buy an expensive encoder simply because the word “professional” sounds impressive.
Spend first on the elements visible and audible to viewers.
4. Turn a 3×3 Meter Bedroom Into a Repeatable Home Studio
Once the setup works, mark the positions.
Put a small piece of tape on the floor for:
- Tripod position
- Chair position
- Light position
- Background distance
This sounds trivial, but it turns setup time from 20 minutes into a repeatable routine.
A good home studio design should be easy to rebuild. If every livestream requires moving half the bedroom, the setup isn’t truly optimized.
Keep the camera at the same height, preserve the lighting angle, and avoid changing the background unnecessarily.
5. Test the Stream Before Calling It Professional
Technical polish means nothing if the stream drops frames or the audio fails.
YouTube recommends testing before going live, including audio and movement similar to the actual broadcast. It also recommends monitoring stream health during the event.
For a 1080p30 stream, YouTube’s current H.264 recommendation is around 10 Mbps, although the correct setting depends on the chosen resolution, frame rate, codec, and network capacity.
Before the real broadcast, check:
- Face exposure
- Background brightness
- Microphone level
- Camera framing
- Internet upload stability
- Encoder status
- Unwanted reflections
- Cable visibility
Leave network headroom rather than pushing your connection to its absolute limit. YouTube recommends keeping roughly 20% upload bandwidth available beyond the stream’s bitrate requirements.
The best professional livestream setup is therefore not the one with the most expensive equipment. It’s the one where every centimeter has a purpose.
A tiny bedroom can become a convincing studio when the camera sees depth, the lighting has intention, the audio is clean, and the equipment disappears into the workflow. That’s the real advantage of spatial architecture: you’re not making the room bigger. You’re making the frame smarter.
Q&A
Can a 3×3 meter room really look professional on camera?
Yes. The camera only records the selected frame, not the entire room. Background distance, lens choice, lighting, and clutter control have a bigger visual impact than the room’s actual dimensions.
Is a mirrorless camera necessary for professional livestreaming?
No. A good webcam or modern smartphone can work for many creators. Upgrade when your current camera becomes the actual limitation rather than buying equipment simply to reach a “professional” label.
Should I use 4K for livestreaming?
Not automatically. For many creators, stable 1080p with good lighting and audio is a better choice. Higher resolutions require more bandwidth and processing, so reliability should come before resolution.

Seo Ji-an worked as a junior broadcast producer before moving into livestream production for beauty brands, independent creators, and online retailers.
During her seven years in digital production, she has handled studio preparation, lighting checks, audio testing, run sheets, and backup streaming systems.
She writes practical guides for beginners who want to prepare a reliable broadcast without turning a small room into an expensive television studio.